Hello Crafty Friends…..
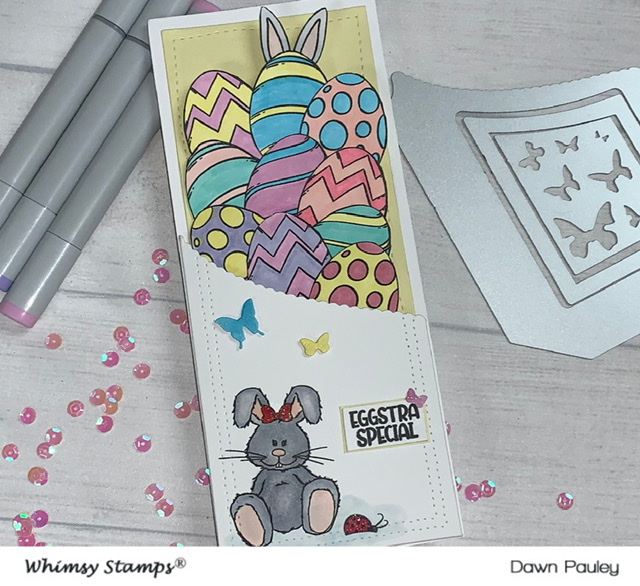
Whimsy Stamps just had another new Mini release on Sunday and one of the new dies was this really cute Slimline Scalloped pocket die. It comes with the main pocket die, center die and a die that cuts out butterflies.
Soooo…. with that being said. I’m going to be making an Easter card that has a pull out tab. Now, I don’t know about you but I’m ready for spring. As I’m sitting here creating this card and writing this post. Outside, we just got a big snowstorm. We have about a foot of snow out there. My kids are thrilled but I’m ready for some sunshine…lol
Any how… enough about snow. Let’s get down to the card.
I will not be posting my usual step by step instructs with pictures today. If you would like to see how I made the card. You can watch my YouTube video below.
First, I die cut the solid Scalloped Pocket. I don’t use the middle die.
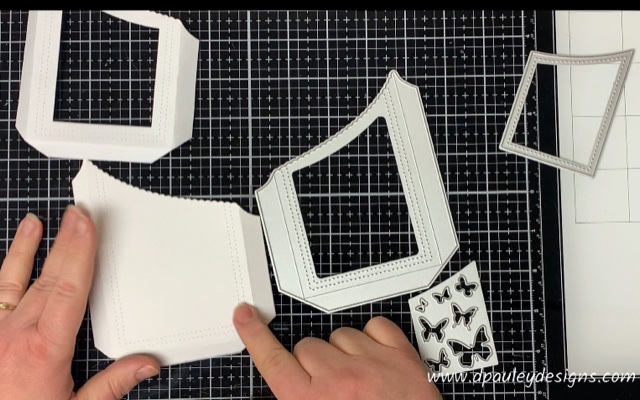
Next, I cut a piece of white card stock cut to 2 ⅞” x 6 ½”. I will use this as my pull tab and attach the eggs to it.
I die cut a piece of Yellow Card stock with the Whimsy Stamps Slimline Card Builder Die. I set these aside for later.
Then, I stamp the bunny from the Whimsy Stamp Hoppy Spring Stamp set onto the front of the pocket with copic friendly black ink.
Once I do that….I color in the Bunny. First, I put some distressed oxide Speckled egg on my glass media mat. Then, I squirt a little water onto the ink and just mix it up really well. I wasn’t going for a dark look. I just wanted a really light hint of green, so I really watered down the ink. I wanted the bunny to look like he was sitting on a little patch of green. So, I just paint a little where he is sitting. (Since I didn’t use watercolor paper, make sure not to saturate your paper or it will ruin the paper if you put too much.
While the green is drying. I color in the bunny. I use C3 Cool Gray for around the edge of the bunny and then I bring in the Neutral Gray No. 0. I continue switching between the 2 colors blending as I go.
I used copic marker R11 Pale Cherry Pink for the inside of the bunnies ear, nose and paw pads. After I put the pink down. I go over the pink with the Neutral gray No.0. This tones the pink down to a softer looking pink.

Next, I stamp a ladybug from the Hoppy Spring stamp set next to the bunny. Using the R29 Lipstick red copic marker I color the lady bug and the Bunnies bow.
Then, I take a piece of cardstock cut to 3 ⅝” x 8 ⅝” and I put glue on all the side flaps of the scalloped pocket and adhere it to the panel. You might want to put something heavy on it to hold it in place until it dries. I used my Misti.
Now, I take the piece of yellow card stock that I had cut out in the beginning and adhere it to the inside of the pocket. You just slide it in as far down as you want it to go and just line it up at the top.
Using the butterfly die, I cut out some of the butterflies and color them in. I also stamped the sentiment “Eggstra Special” from the Eggstra Special stamp set onto a piece of white card stock with a yellow border and a butterfly on it. Then I put foam tape on the back of the sentiment and adhere to the card. I also put foam tape on the back of the butterflies to give them dimension.
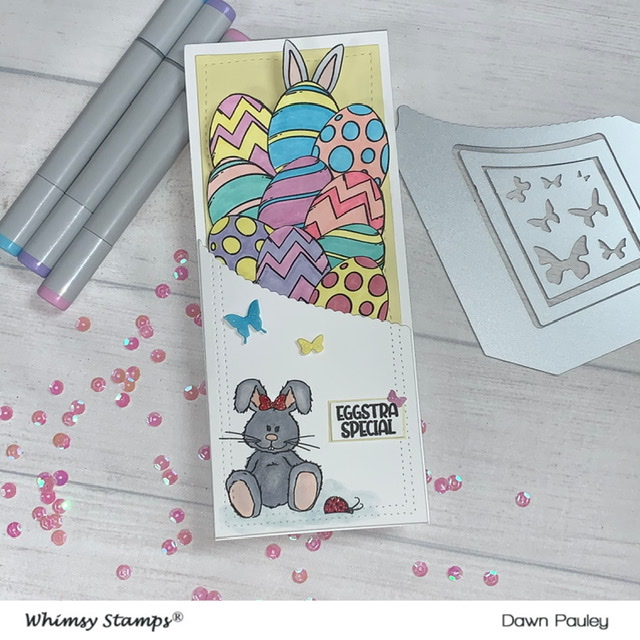
Next, I stamp 10 eggs and a pair of bunny ears on a piece of card stock. I color them in using the following copic markers.
BV01-Viola, BG02-New Blue, BG23-Coral Sea Blue, RV63-Begonia, R20-Blush and Y13-Lemon Yellow
After, I colored them in I just fussy cut them out. Then, I take that piece of white card stock that I had cut at the beginning to 2 ⅞” x 6 ½” and place all the eggs where I want them to go and glue them to the panel. I leave the top 3 eggs hanging off the top of the panel.
Then, I glue the ears onto one of the eggs so it looks like a bunny is behind the eggs, which I thought was so cute.
I wanted a sentiment to be on the inside of the card, so when you pull out the panel it says Hoppy Easter. So I stamp the sentiment with black Ink.
I decided I wanted to add some shine to the card. So, I colored the butterflies, ladybug and the bow with my Wink of Stella pen.
That completes my card for today. If you would like to see how I made the card, I have attached the video below!
I have attached a list of the products I used to create this card if you are interested.
Affiliate Links may be used at absolutely NO Charge to you. All items have been personally purchased by me except for the Whimsy Stamp products which are supplied for being on their Design Team. I do not work for any of these companies. Whether gifted or products I bought, I only recommend products I personally use and like. All opinions are my own. Proceeds I make off of the affiliates helps me to offset some of the cost to maintain my blog, Youtube channel and supplies needed to bring you new content.
Copyright: I am happy to share my creations with you. I don’t mind if you use them for your own personal use. If you decide to share what you’ve made online, please link back to my Youtube Channel or Social Media post that inspired your design. While I love this and encourage it. It is NOT ok for someone to sell anything that was created by my design or to use my photos for any type of compensation. I appreciate your understanding in this.
D Pauley Designs is a participant in the Amazon Services LLC Associates Program, an affiliate advertising program. I may earn small commission off of your purchase.


Cute card. That you . Love the stamps and dies.
Thank you Debbie!