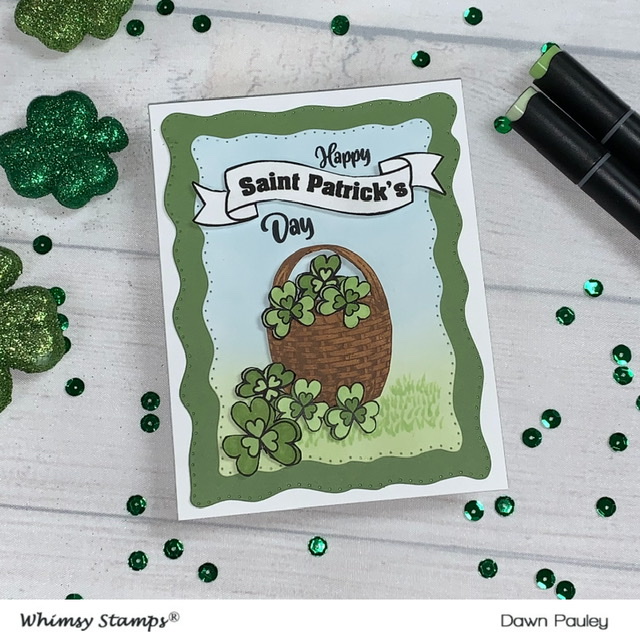
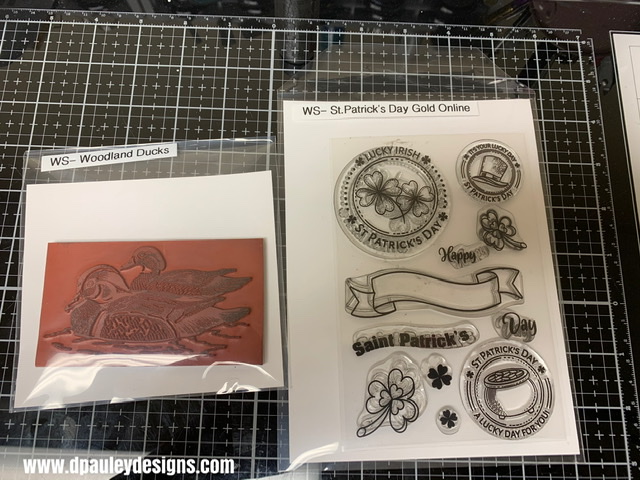
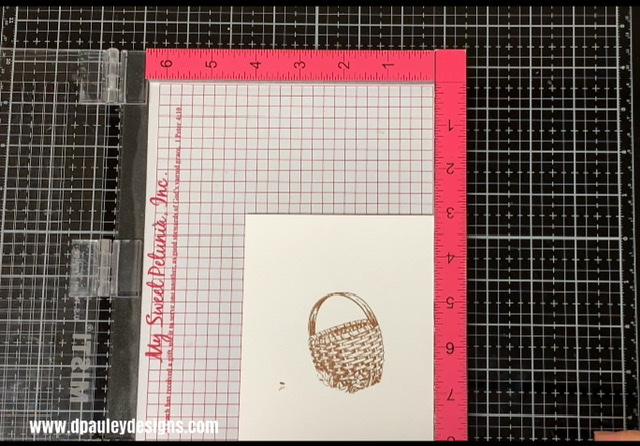
Hi Crafty Friends……Dawn Here. Today, I will be making a cute St. Patrick’s Day card using the New Red Rubber Stamp basket and St. Patrick’s Day Gold Stamp Set.
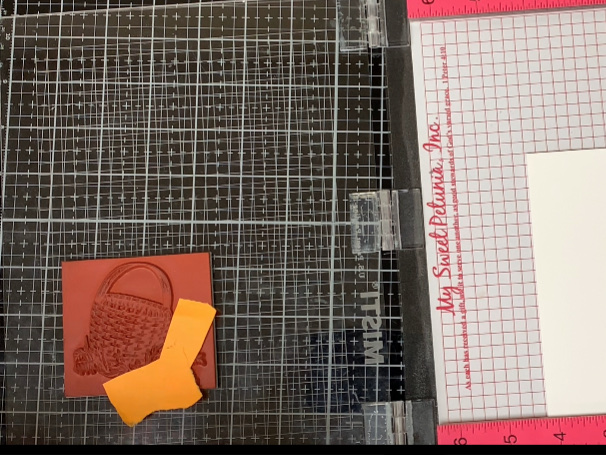
To start, I stamp the basket using my misti stamping tool. Since it’s a rubber stamp you will need to take the foam insert out of your misti in order to get a good impression.
I only want to stamp the basket and not the flowers. So, I use masking paper to cover the flowers on the stamp. I just cover them up as best as I can.
Then, using distress oxide ink – Vintage Photo. I ink up the stamp really well. When I’m ready to stamp the image, I take off the masking paper. Otherwise, ink will get all over your paper.
Next, I color in the basket using my copic marker. I used E35- Chamois to color it in. I didn’t do anything special. I didn’t really have to do a lot of ink blending because the vintage photo was darker than the copic marker, so it gave the look of shading for me. There are a few flowers left in front of the basket and I just colored them with the E35- Chamois because I end up covering them up with the clover flowers.
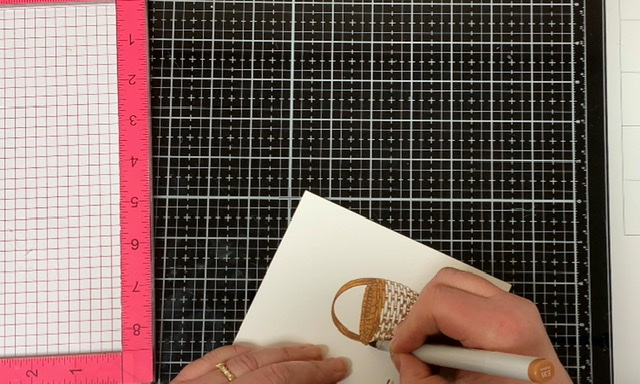
I fussy cut all around the basket. It’s a pretty simple image to cut out. I cut out the space between the handle and the basket, so I can make it look like the clovers are in the basket when I assemble the card.
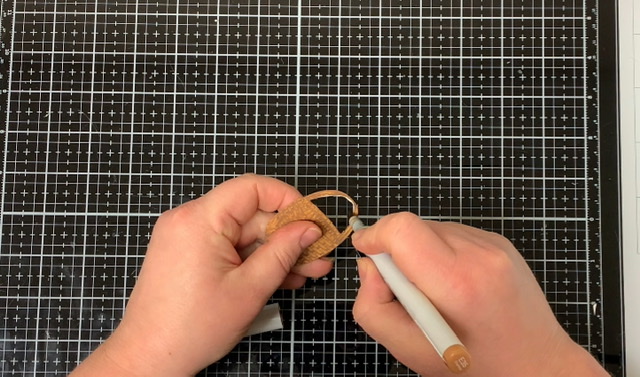
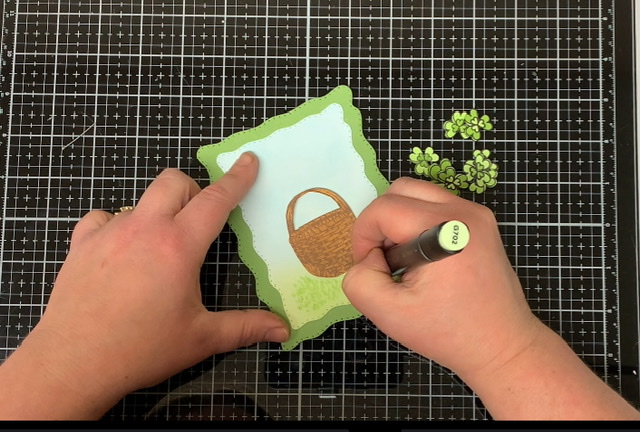
I take the same brown marker and go around all the edges of the basket to cover up an white showing.
Using the New St. Patrick’s Day Gold Stamp set, I stamp a bunch of small clovers and one big clover.
I color in all the clovers using my Altenew Alcohol Markers. I picked two different color greens. I used Forest Glades and Frayed Leaf.
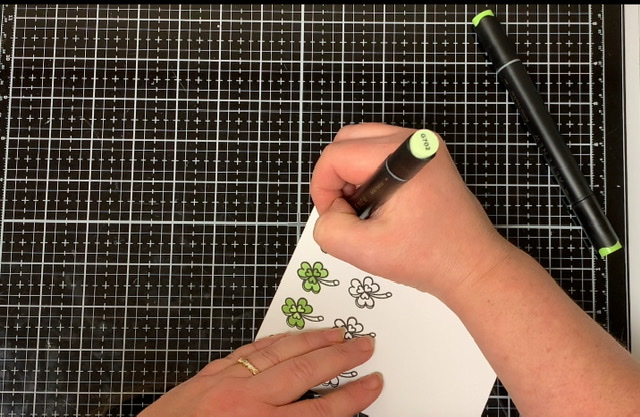
Next, I fussy cut all of the clovers out. Using my black Alcohol marker, I go around all the edges of the clovers so you don’t see any white that might be showing from cutting them out.
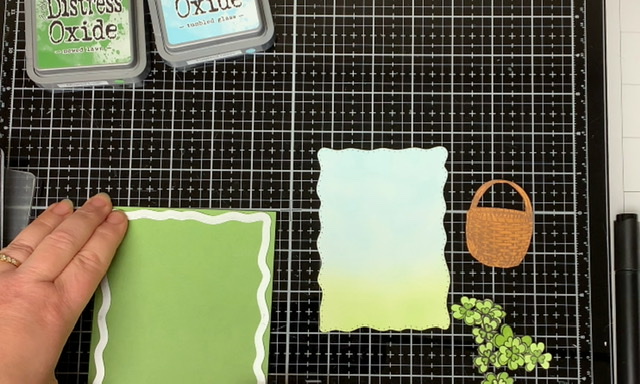
Using my distress oxide inks, I Ink blend a background. I chose to use Mowed Lawn for the grass and Tumbled glass for the sky. Using my blending tool I go back and forth. I try to keep a light hand because I don’t want the background to be very dark. I keep a scrap piece of paper off to the side where I tap off some of the color so I don’t get any harsh spots on my paper.

Using the Whimsy Stamp Wavy Pierced Rectangle dies, I cut out the background. Then, using the same dies, I use the next size up and cut out a green background. Once I have my backgrounds cut out, I start to assemble the card. I glue the background panel to the green card stock.
I put foam tape on the back of the basket and place it where I want it to go on the card.
Then, I take the Frayed Leaf green marker and just make little grass marks in the grass area. I just used upward strokes and I was barely touching the paper.
I place the banner in my misti and using black ink, I stamp the outline of the banner. Then, I place the St. Patrick’s sentiment inside the banner and stamp it with the black ink.
I fussy cut the banner out. Then, I took my black marker and went around all the edges so you can’t see any white left from cutting it out. It just gives it a nice finished look.
Then, I line up the banner where I want it to go on the card with foam tape and then stamp the word Happy above the banner and the word Day below the banner.
Next, I glue all the clovers to the card where I want them to go. Some of the clovers I put foam tape on the back of them and some of the clovers I glued straight to the card.
Then I adhere my panel to a piece of card stock folded to 5 ½” x 4 ¼”.
That completes my card for today. If you would like to see how I made the card, I have attached the video below!