Hi friends! Dawn here, and today I’m sharing a super quick and absolutely adorable card created using some fun new products from the Not 2 Shabby Shop. This project is perfect if you’re looking for an easy card design that still has lots of charm and personality.
Products Used
For today’s card, I featured two coordinating products:
- Lemon Love & Lavender Hugs Stamp Set – This stamp set is so sweet and includes a variety of cute images that are perfect for coloring. The sentiments are fun and versatile, making this set great for many different occasions.
- Lavender Love Pattern Paper Pack – This paper pack includes 12 different designs with four sheets of each. The papers are double-sided and feature a beautiful mix of florals, gingham, and polka dots. You also get some really cute images that can be fussy cut or cut out with a Brother ScanNCut.
Check out my video for all the details on how to make this card!
Creating the Card
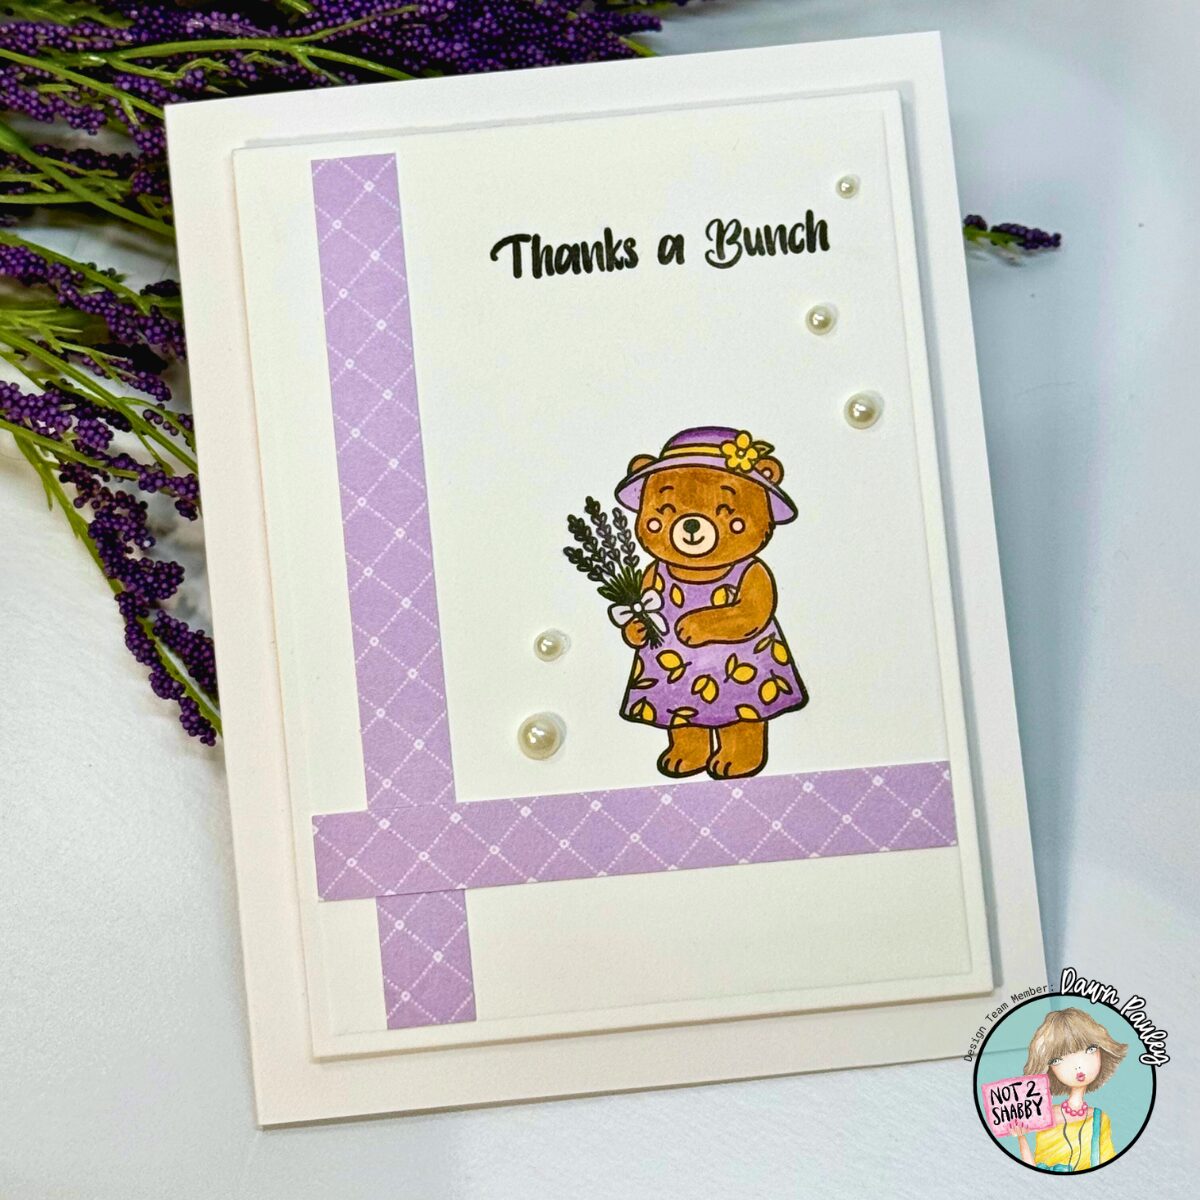
I started by die cutting a rectangle from white cardstock. You can use any size you like—I chose one slightly smaller than my A2 card base. Using a black Copic-friendly ink, I stamped my image and sentiment onto the rectangle, positioning the image slightly off to the right.
Next, I selected two pieces of pattern paper and cut them into strips about ½ inch wide. You can easily adjust the width depending on your preference. The rectangle die I used has a decorative indented line around the edge, and I wanted the pattern paper to line up right to that detail—not all the way to the edge. To do this, I placed the pattern paper where I wanted it, marked it lightly with my pick, and trimmed it down. That little bend makes it much easier to see where to cut.
Coloring the Image
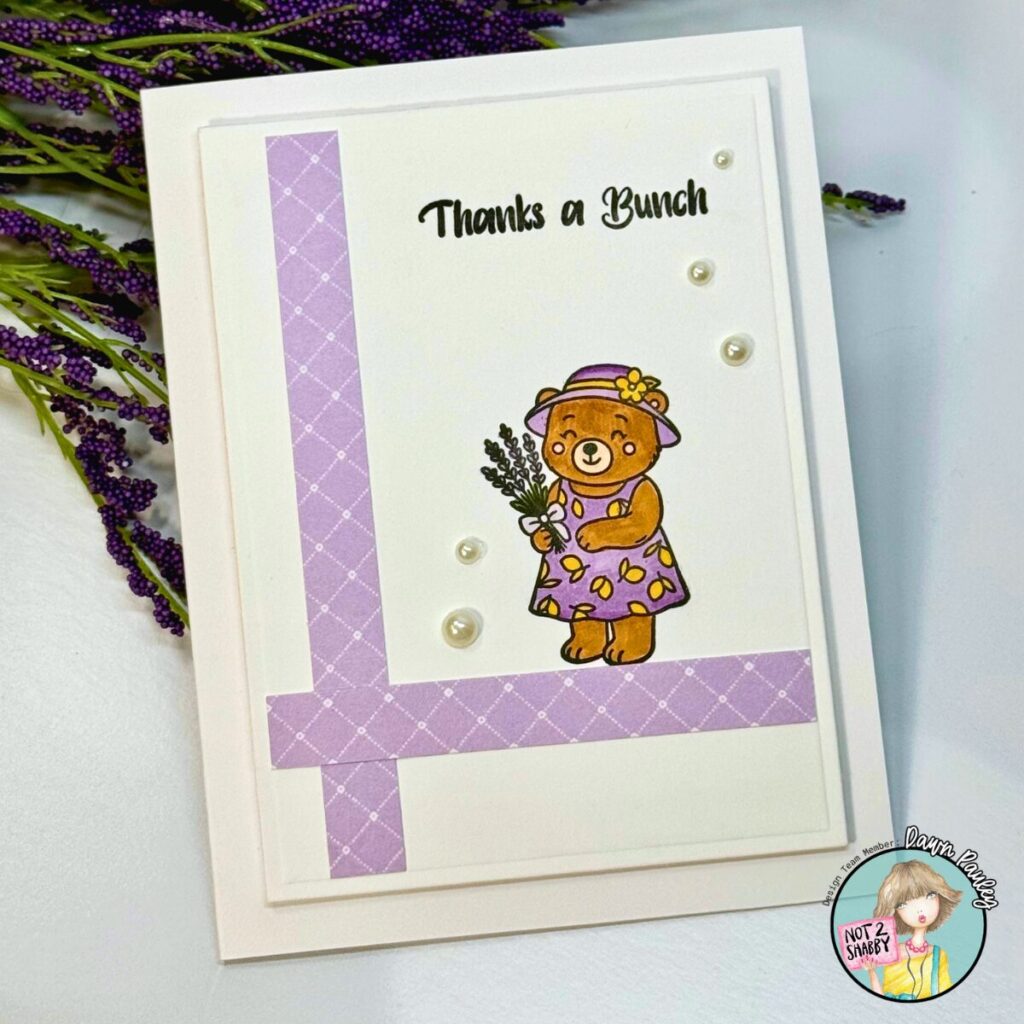
For the coloring, I kept things very simple—no shading, just basic coloring.
- Yellow for the flowers on the bear’s dress and hat
- Light brown for the bear’s body
- A very pale color for the muzzle
- Light pink for the ears and cheeks
- Light purple for the dress and hat
- Green for the leaves in the bouquet
- Light purple again for the bow and flowers
This simple approach keeps the card quick and stress-free while still looking finished and cute.
Assembling the Card
To assemble the card, I adhered the longer strip of pattern paper horizontally on the left side of the rectangle. Then I added the smaller strip vertically underneath the bear’s feet so it looks like she’s standing on the cardstock.
I added a piece of craft foam to the back of the card front for dimension and then adhered everything to an A2-sized white card base.
Finishing Touches
To finish off the card, I added my favorite self-adhesive pearls. I like to use a craft knife to pick them up—it makes placement super easy. Once they’re where I want them, I press them firmly into place.
Final Thoughts
And that completes today’s card! This project came together quickly and turned out so adorable. It’s perfect when you need a fast card but still want something handmade and special.
Thanks so much for stopping by my blog today. I hope this card inspires you to pull out your stamps and pattern paper and get crafty. Happy crafting!
I have attached a list of the products I used to create this card if you are interested.
I also have a 15% off your order code for the Glassboard Studo Glass Mats. – DPAULEY15
Affiliate Links may be used at absolutely NO Charge to you. All items have been personally purchased by me except for the Whimsy Stamp products which are supplied for being on their Design Team. I do not work for any of these companies. Whether gifted or products I bought, I only recommend products I personally use and like. All opinions are my own. Proceeds I make off of the affiliates helps me to offset some of the cost to maintain my blog, YouTube channel and supplies needed to bring you new content.
Copyright: I am happy to share my creations with you. I don’t mind if you use them for your own personal use. If you decide to share what you’ve made online, please link back to my Youtube Channel or Social Media post that inspired your design. While I love this and encourage it. It is NOT ok for someone to sell anything that was created by my design or to use my photos for any type of compensation. I appreciate your understanding in this.
D Pauley Designs is a participant in the Amazon Services LLC Associates Program, an affiliate advertising program.
I may earn small commission off of your purchase.